How to contour like a professional make-up artist
Want to know how to contour? From the best contour kits to where to shade and highlight for your face shape, we've got you covered

Want to know how to contour properly? We've got you covered
Ever wondered how to contour your face with makeup and not look, well, frankly a bit frightening?
Sure, Kim Kardashian makes it looks as simple as applying moisturiser in the morning, but she has a sizeable glam squad for beautifying her for two hours every day.
And sure, there's a whole lot of Instagram videos and Youtube tutorials readily available for us to consume, but without the background information on the best contouring kits available and exactly where to shade and highlight for your face shape, you're simply not equipped with all the knowledge you need.
That's why we've compiled a definitive guide to contouring properly – the tools, the make-up, the lot.
So whether you’re aiming for chiselled cheekbones that would give Kate Moss a run for her money or give your face slightly more definition, we’ve got your covered.
Best contour kit: What you'll need
Cream contour
Cream or stick contour formulas are best for high definition and precise contouring. Try Cover FX Contour Kit, £40, Fabled – there's a shade for every complexion.
Celebrity news, beauty, fashion advice, and fascinating features, delivered straight to your inbox!
Contour powder
Best for subtle contouring.
Try Nars Contour Blush, £30, Fabled, or Charlotte Tilbury Filmstar Bronze & Glow, £49. The slight shimmer will pick up the light to make your skin glow.
Contour tools
Flat brush
If you want chiselled cheekbones, try a flat brush. The packed bristles means it holds a lot more product, while distributing evenly to areas of application. Think Kim Kardashian. Try Stila Custom Contour Brush, £33, Fabled.
Angled brush
For a subtley sculpted face, use an angled brush to hug the natural contours of your face and blend back and forth along the area you’ve applied your contour powder or cream. Try Estée Lauder Perfectionist Sculpting Brush, £38, Fabled.
Blending sponge
If you’re using liquids or creams to contour, use a make-up sponge to blend seamlessly. The go-to here is Beautyblender, £17, Fabled.com, but your local drugstore will have cheaper alternatives if you're not prepared to invest just yet.
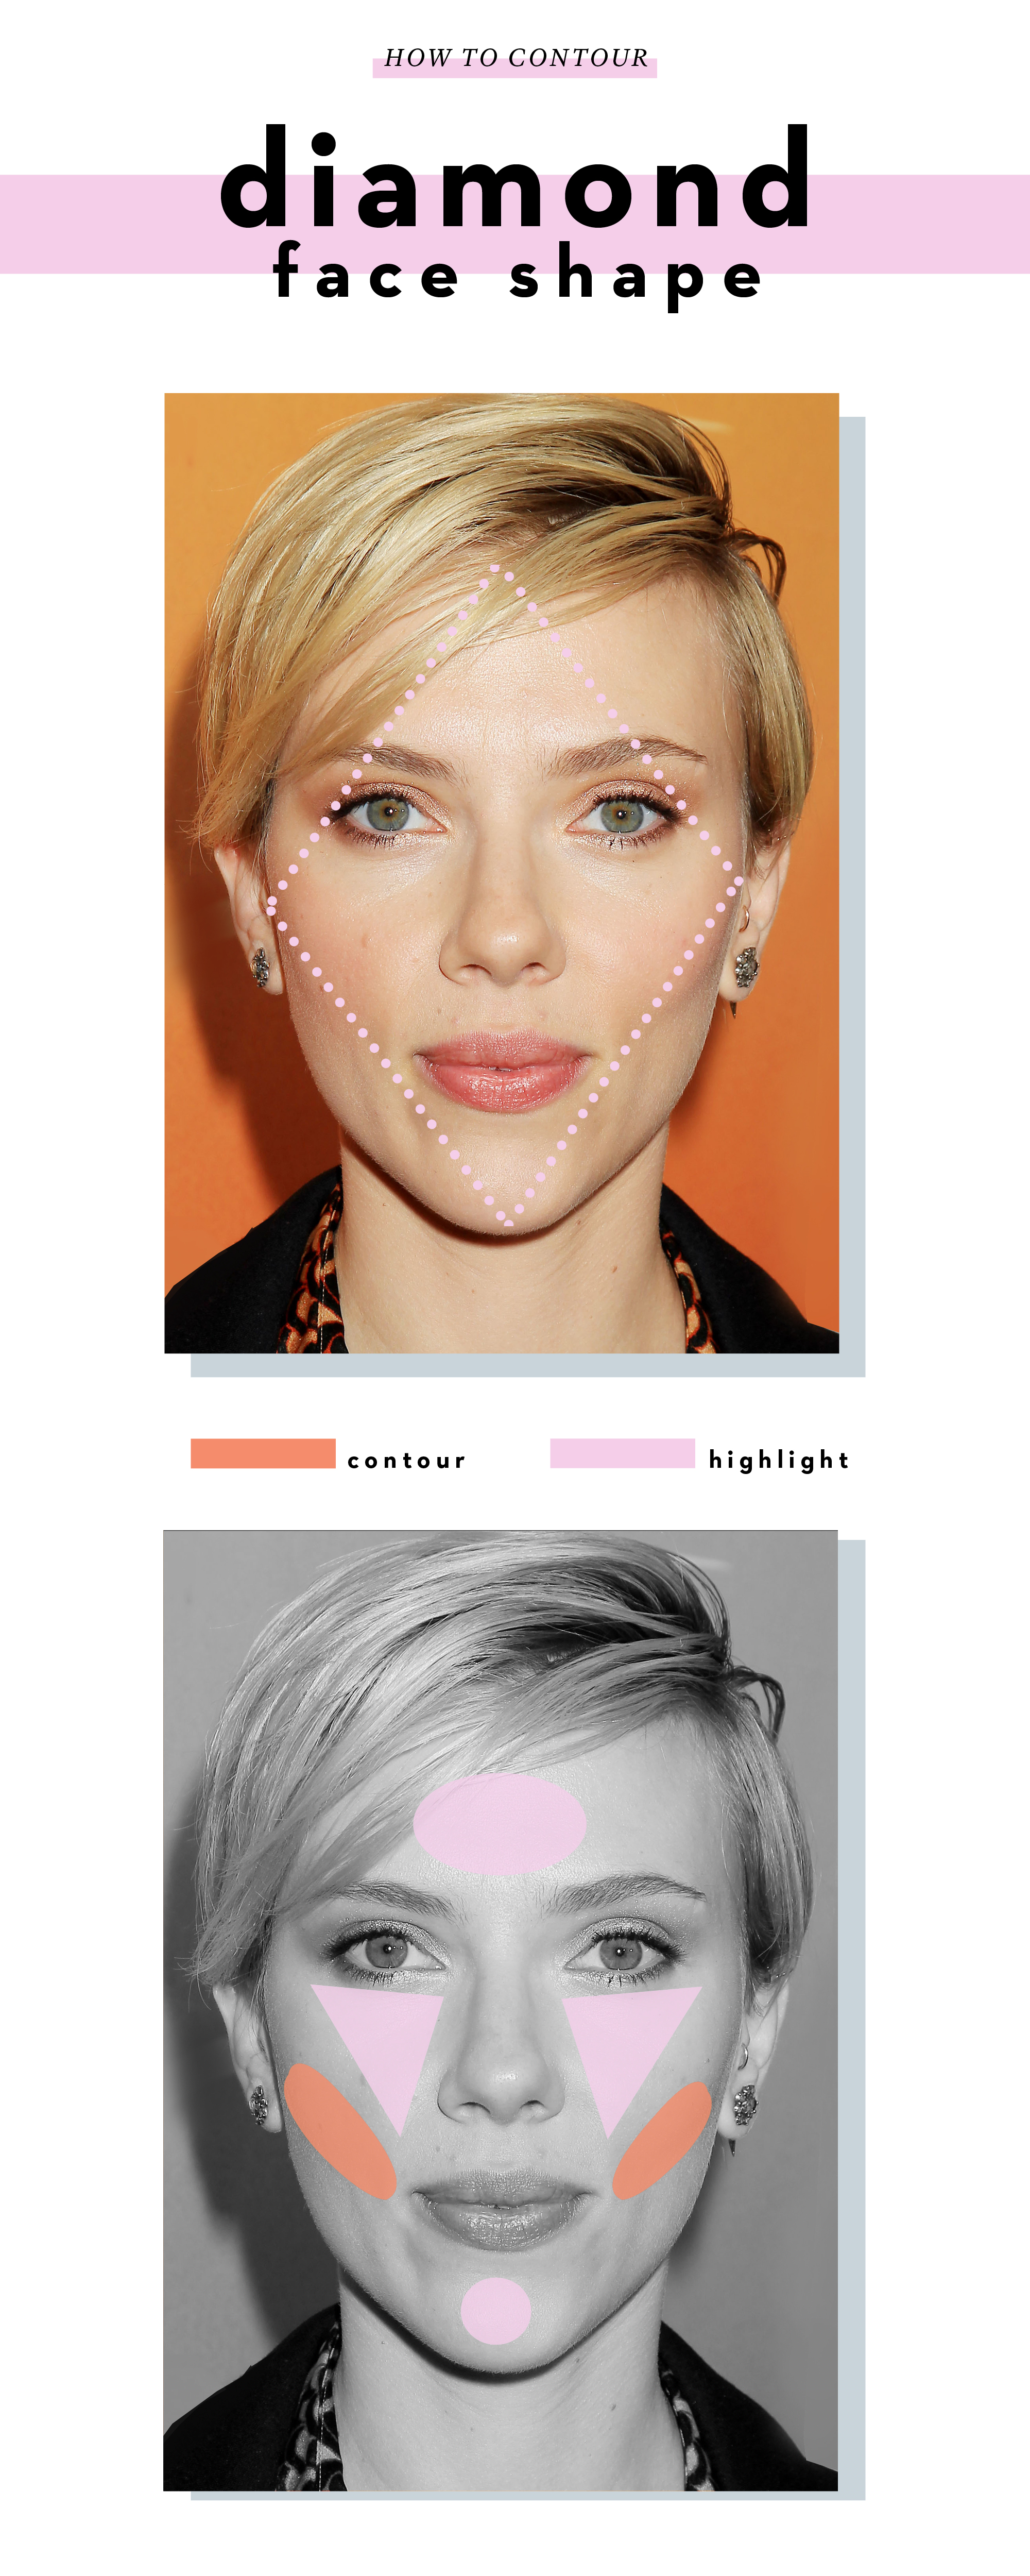
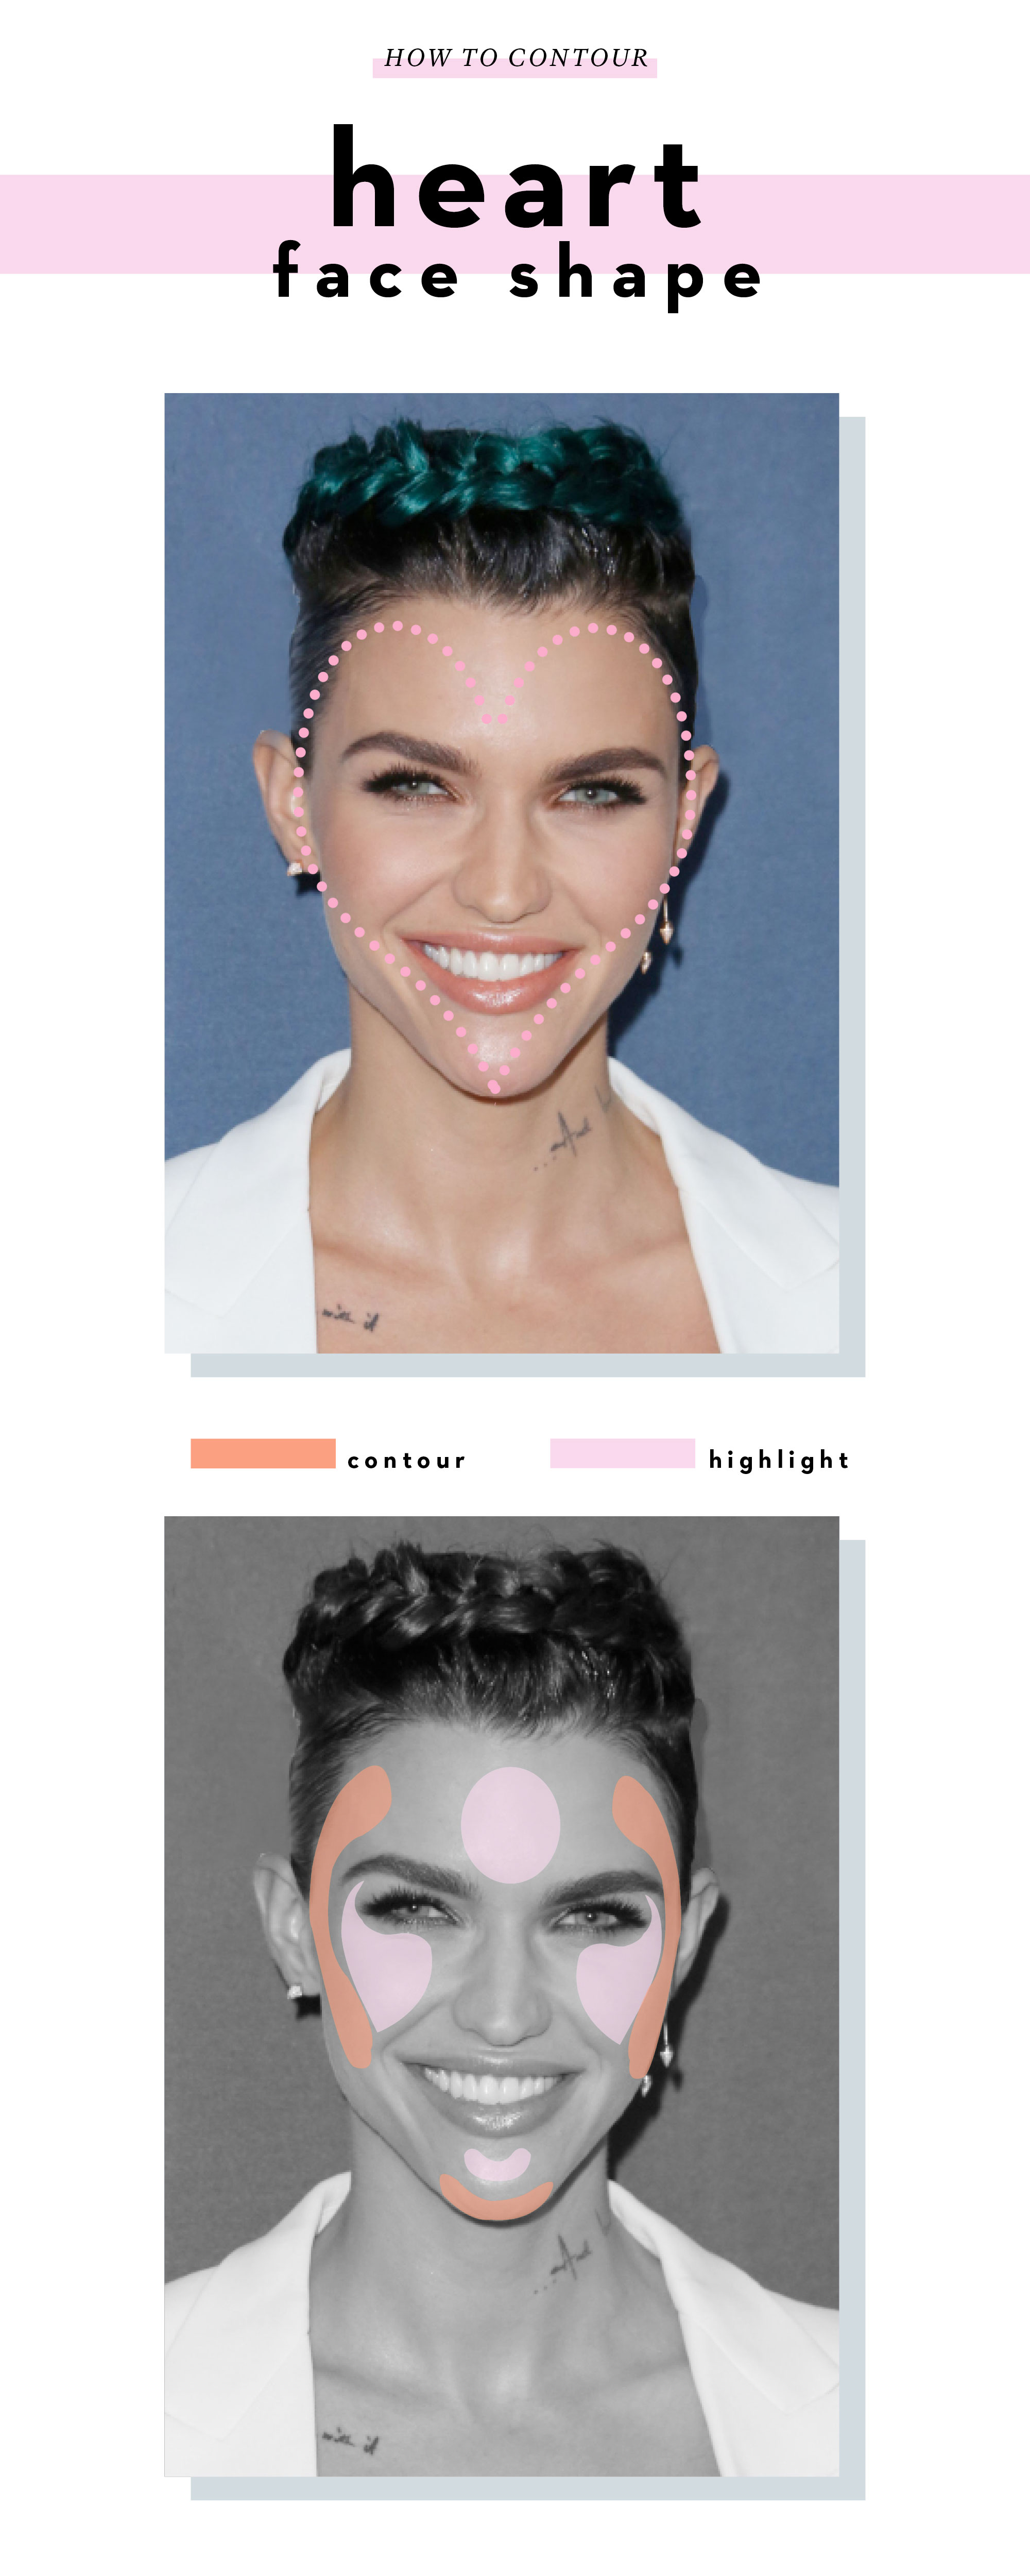
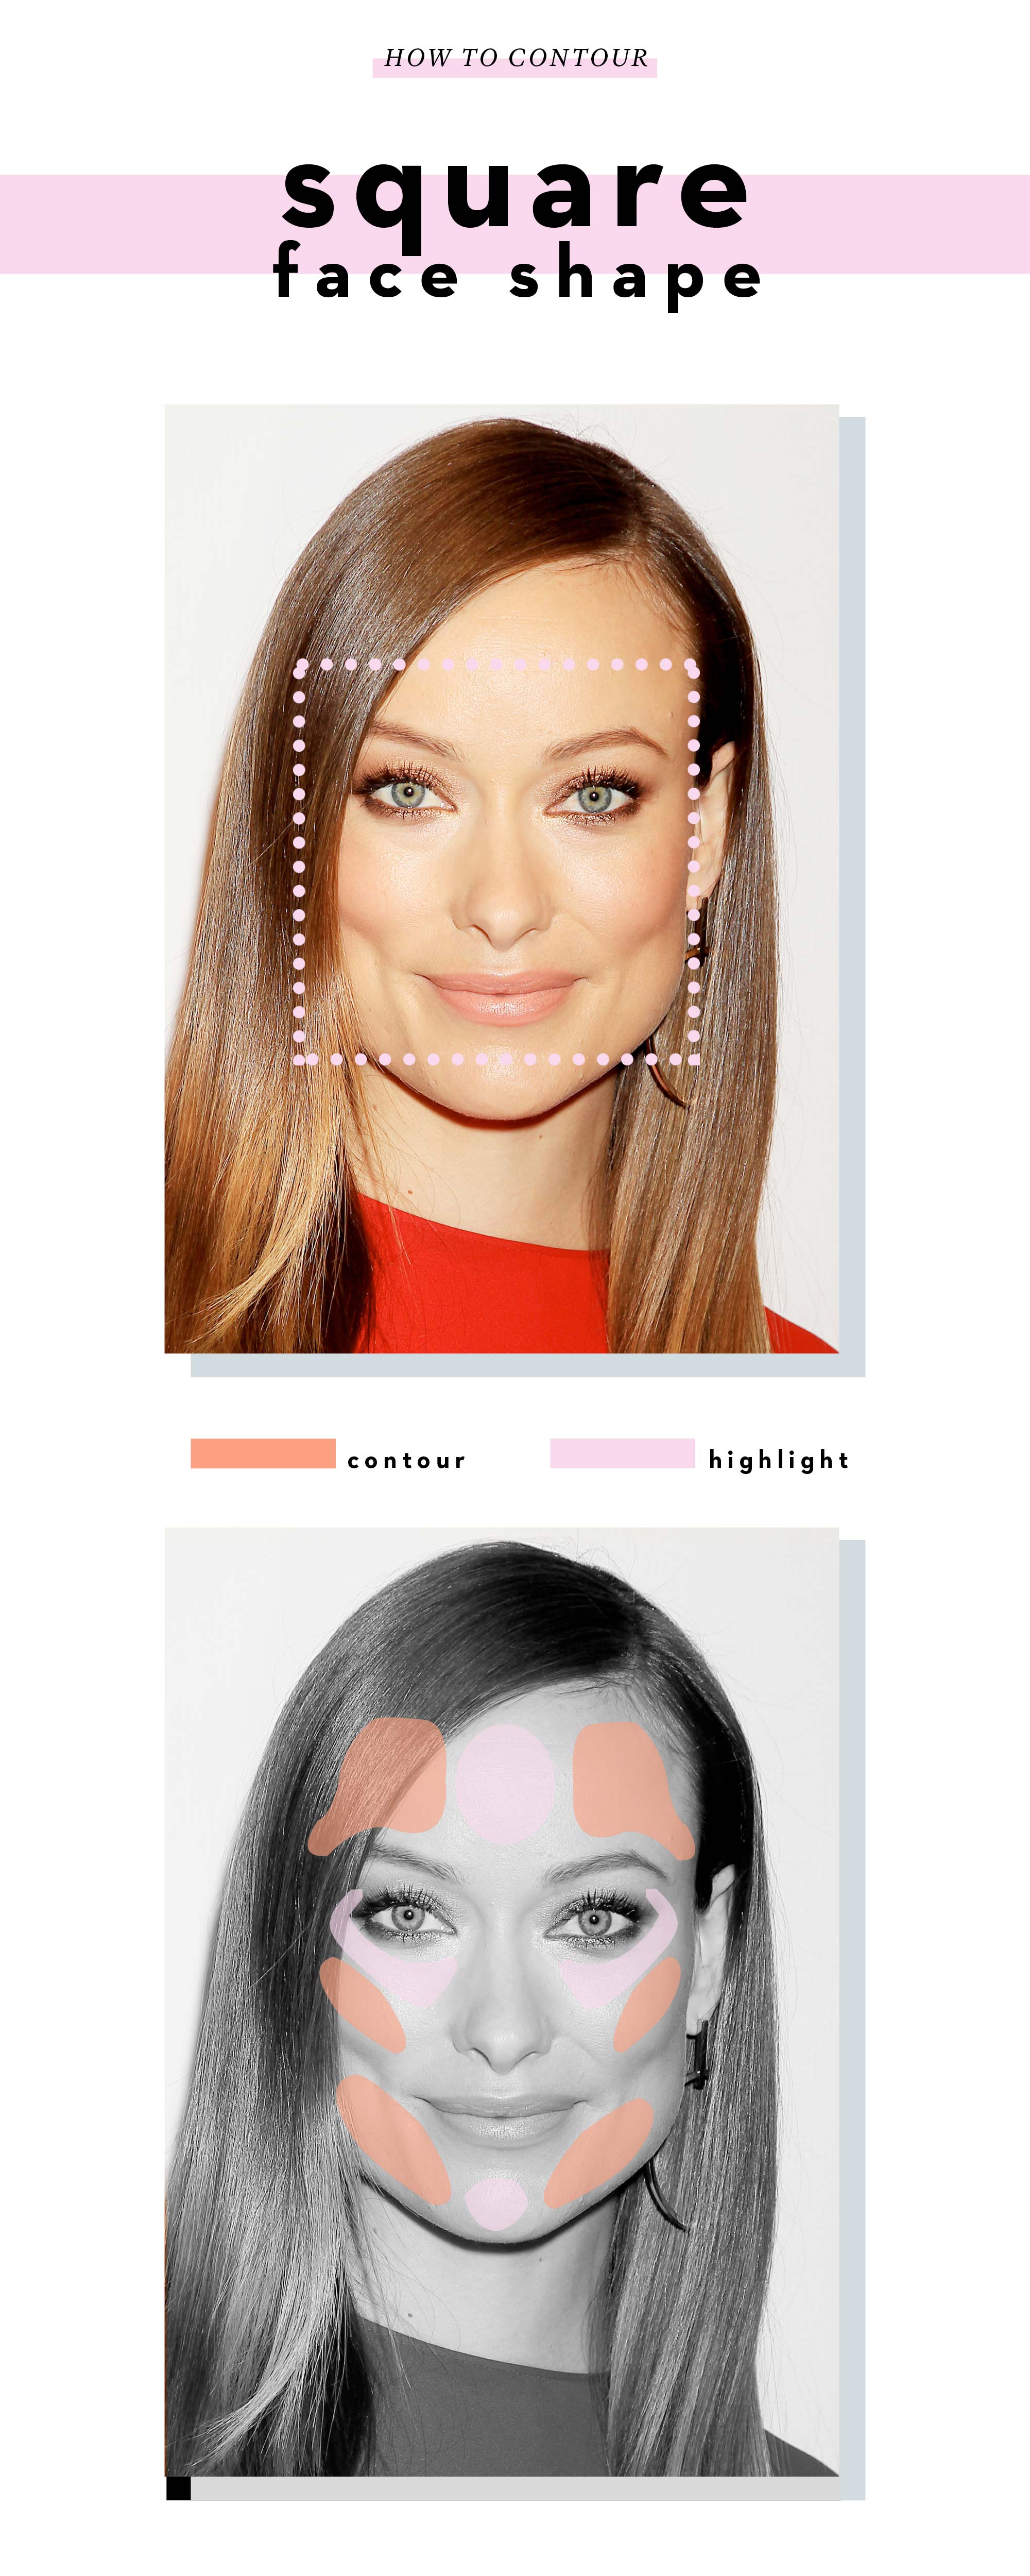
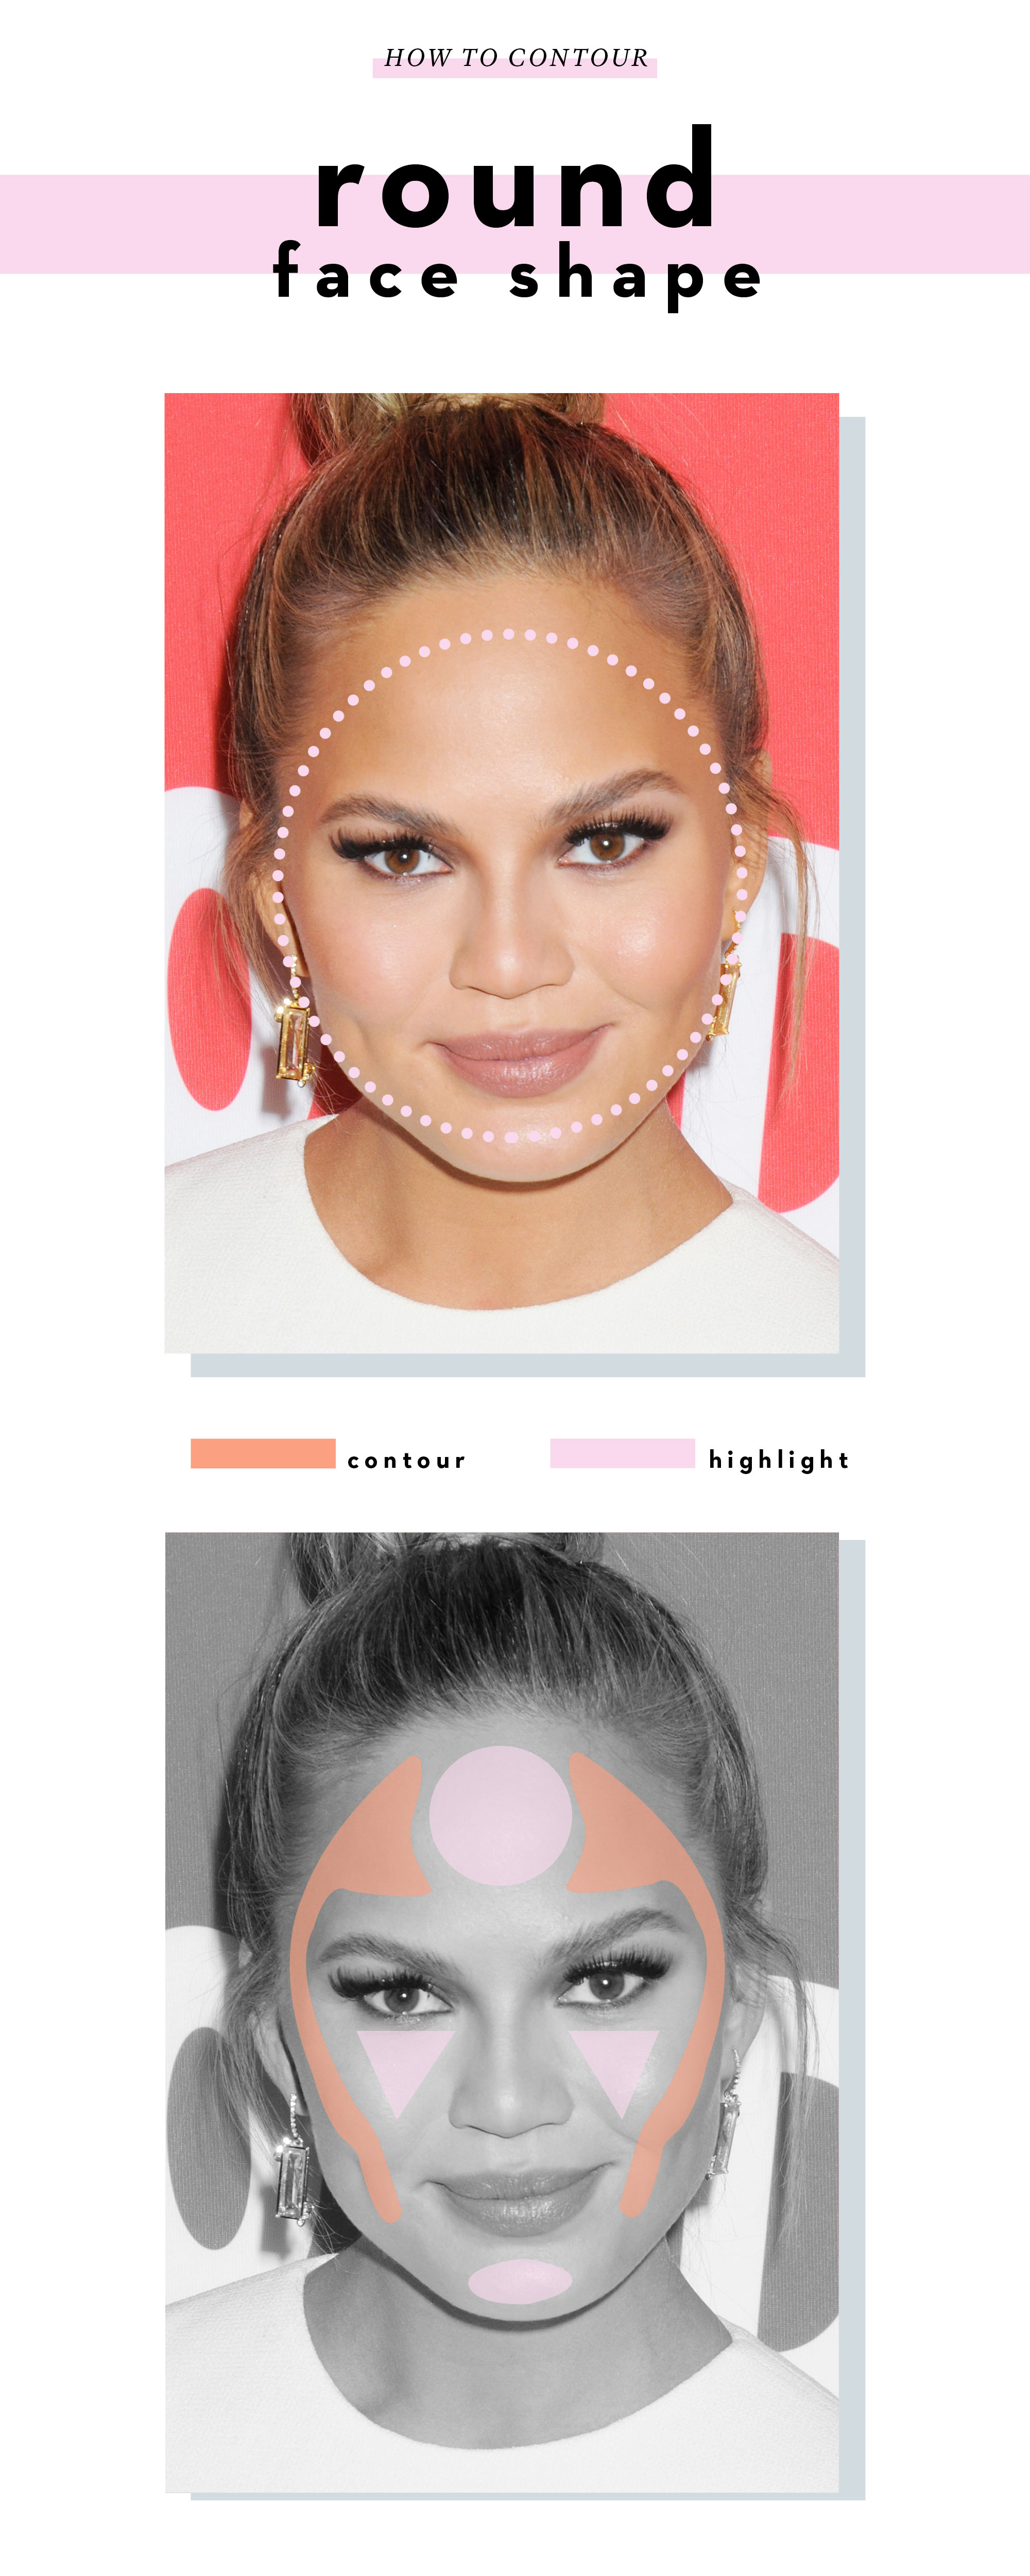
How to contour for your face shape
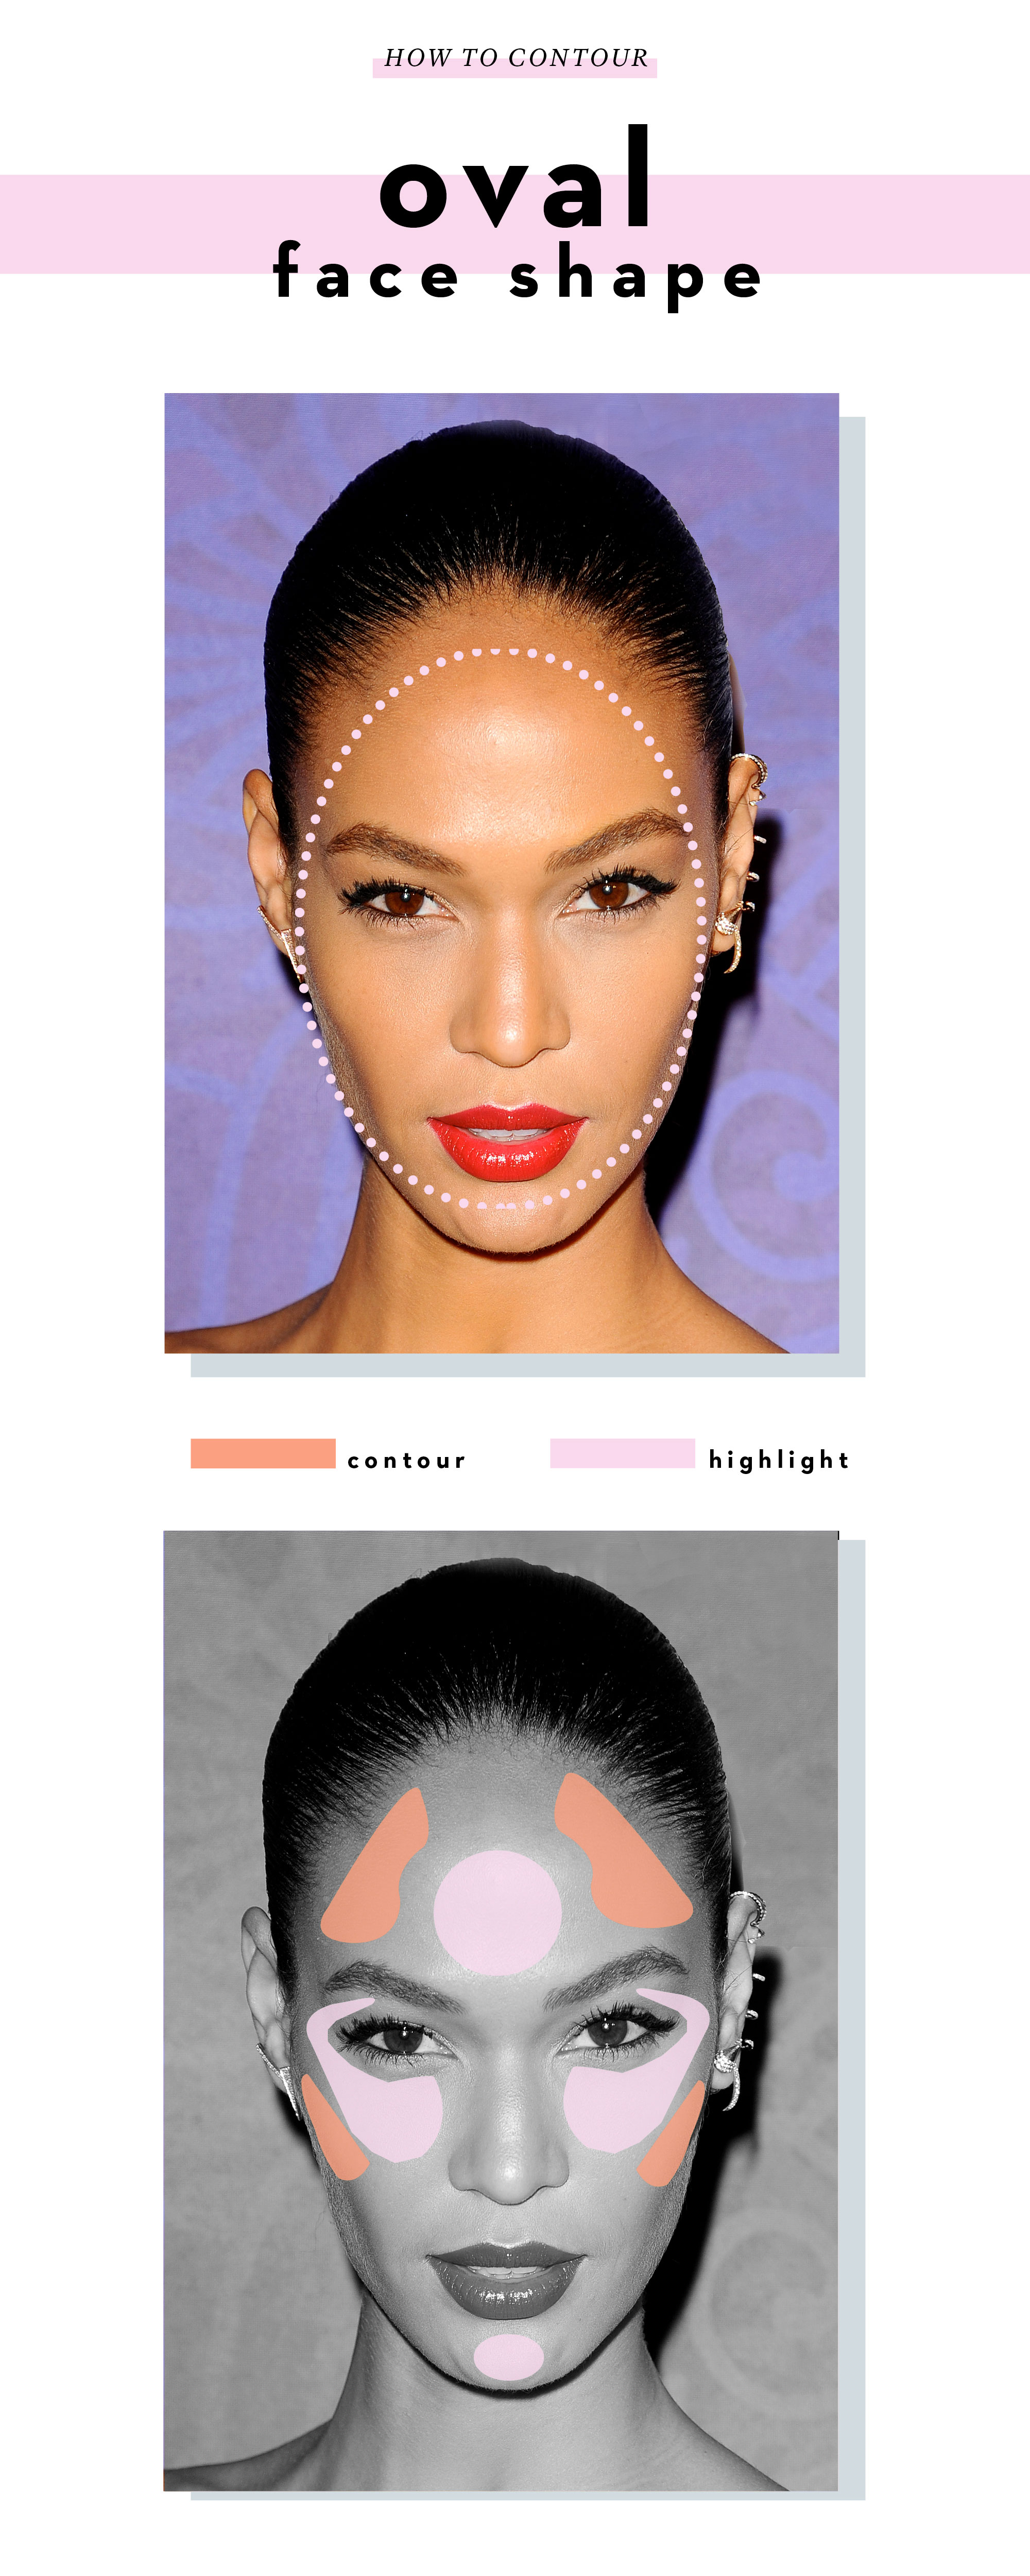
How to contour for beginners
Never contoured before? Don't panic. Just follow this cut-out-and-keep guide to make sure you know how to contour like a pro.
The first top tip is: know your face. The idea with contouring is to shade the areas your want to sculpt. Then, highlight the areas you want to accentuate.
Generally you should shade below your cheekbone, down the length of your nose on either side, around your hairline and along your jaw line.
1. Apply your foundation as normal.
2. Starting from your ear, just below your cheekbone, brush your dark shade contour cream or powder on a 45 degree angle. Stop in line with your pupil. Blend with a brush, following the same line to create a sculpted look. Start off lightly and add more product for more definition if needed.
3. Repeat on the other side to balance everything out.
4. If you want to make your nose appear slimmer, use a smaller brush to apply your dark contour cream or powder to either side of your nose, blending outwards as you go.
5. To make a large forehead appear smaller, brush your dark contour cream or powder along your hairline and blend in towards the centre of your forehead.
6. Add definition to your jawline by brushing your dark contour cream or powder along the length of your jaw and at the base of your chin. Blend downwards to create a shadow underneath your jaw.
7. Hide dark circles under your eyes by applying concealer in a lighter shade than your skin tone in an upside down triangle, parallel to you nose, from the inner corner of your eye, under your lower lash line, down to your cheek and up the outer corner of your eye.
8. Apply your highlighter by starting at the top of your brow arch and bringing it down to the top of your cheekbone, then blend in the shape of a ‘c’.
9. Brush highlighter down the bridge of your nose and along the tip.
10. Starting in between your brows, apply your highlighter in the shape of an upside down triangle and blend outwards. If you have a small forehead and want it to appear larger, apply a larger triangle of highlighter and if you want it to appear smaller, apply a smaller triangle of highlighter.
11. Highlight your cupids bow and the centre of your chin,
