
As Marie Claire UK’s Junior Shopping Editor, I cover a LOT of beauty content, which means trying out new beauty products has become pretty much a part of my day-to-day life. You’d think I’d have tried all of the most iconic beauty products by now, right? Surprisingly, I haven’t.
You see, I’ve lost count of how many new and trending products I’ve reviewed in the name of journalism, from the best hair straighteners to products for wavy hair. But often it’s the most popular and long-standing products that I’ve not had a chance to try out yet - the Dyson Airwrap included.
Probably the industry’s most coveted and famous hair tool, the Airwrap is considered one of the best hair multi-stylers out there. Originally launched in 2018, it promises to make creating professional-looking styles at home as easy as possible. With multiple innovative attachments, you can dry, curl, shape, diffuse, volumise, and smoothen flyaways all with one tool. At £479.99 for the newest model, it doesn’t come cheap, but according to beauty editors and hair stylists alike, it’s absolutely worth the money.
Well, I finally got my hands on the Complete Long Volumise model in the Blue/Copper colourway, and decided to give my brutally honest Dyson Airwrap review for anyone who, like me, has yet to try it out. Let me be clear here: this isn’t an in-depth explainer on what the Airwrap does, we already have one of those, instead it’s my genuine first impressions review.
As someone who struggles to style their hair (I tend to prefer the lazy girl method of just letting my hair dry into natural waves half the time, and stick to a simple straight blow dry the other half), I’m pretty much the perfect person to try this product out for the first time. Any complications you could come across when trying the Airwrap out for the first time? Consider them covered for you in this review.
If you’re after the best affordable Dyson Airwrap alternatives, Dyson Airwrap deals or even a Dyson Supersonic hair dryer review, we’ve got you covered there too. But for my Dyson Airwrap review, keep reading.
Shop the Dyson Airwrap

My Dyson Airwrap review
First impressions
Upon first opening my Dyson Airwrap box, I was struck by what I could only describe as the sleekest packaging ever. The entire tool - complete with six attachments - fits inside the handy case, which is great for storage. Forget losing your head attachments and cluttering your space, you can store them all in the sleek box.

the Dyson Airwrap complete with all the attachments and storage box
The multistyler itself also feels expensive. It has a good weight to it (but isn’t too heavy to carry while styling your hair for prolonged periods). The attachments were easy to slot into place and switch around at the flick of the ‘locked’/‘unlocked’ switch, making the whole process surprisingly quick and easy.
Getting started
When it came to prepping my hair, first, I had to make sure my hair was freshly washed and only 50% dry. I found that styling my hair when it’s already fully dry or when I was on the second day of my hair wash cycle would still result in a decent style, but it wouldn’t have the longevity I was after.
My Airwrap has six attachments:
- The 30mm long barrel - this creates voluminous curls which can be switched between a clockwise and anti-clockwise direction, to frame your face.
- The 40mm long barrel - the same as the barrel above, but thicker. This barrel is great for thicker, longer hair or if you’re after looser waves.
- The large round volumising brush - one of the newer head attachments, this brush shapes and volumises. I used this for lifting and drying my hair from the root.
- The firm smoothing brush - if you’re after a smoother, straighter style.
- The diffuser - another new attachment, this helps to enhance natural waves, curls and coils.
- The Coanda smoothing dryer - the finishing-touch tool to dry, smooth and tame flyaways once you’re finished creating your desired style.
It was important to choose the right attachments I would need for my desired style - I was after sleek volume and a loose wave, so I went for the 30mm long barrel, the large round volumising brush and the Coanda smoothing dryer to finish off my look. You could probably get away with using just one of the attachments to dry, shape and go if you were in a rush, but I wanted to get the full Airwrap *experience*, so I decided to try three of them out for one hairstyle. If I wanted to enhance my natural waves, I’d simply use the diffuser attachment to fully dry my hair, or similarly if I wanted a smooth, straight look, I’d use the firm smoothing brush.
Using the Dyson Airwrap for volumised waves
So how did I get on actually using the Airwrap to create the volumised waves I was after? After ensuring my hair was fully prepped and parted, I decided to start with the long barrel. I’ll admit, this was the attachment I was most afraid of, as it looks like a recipe for a tangled mess, but again, it was surprisingly easy to use once I got the hang of it.

valeza using the Dyson Airwrap to create ringlet curls
I simply had to make sure the tool had a good grip on the bottom of my hair, and slid it upwards to wrap the rest of the section of hair along the barrel. Temperature control was important here too: I held it for a few seconds on the hot temperature, then gave it a ‘cold shot’ to set the curl and enhance shine before turning it off and unravelling my lock of hair into a satisfying ringlet.
Importantly: I made sure to keep an eye on the direction of the barrel, aiming to curl my hair away from my face, so as to frame it better. You can always stick to one direction or mix and match for more of a natural-looking wave - it’s completely up to you.

Valeza demonstrating how to switch the attachment and the direction of the curl on the 30mm barrel
When I got to the top section of my hair, I used the large round volumising brush at the roots only, to create lift and volume, before using the barrel on the lengths to generate a curl. Finally, I used the Coanda smoothing dryer to tame any flyaways.
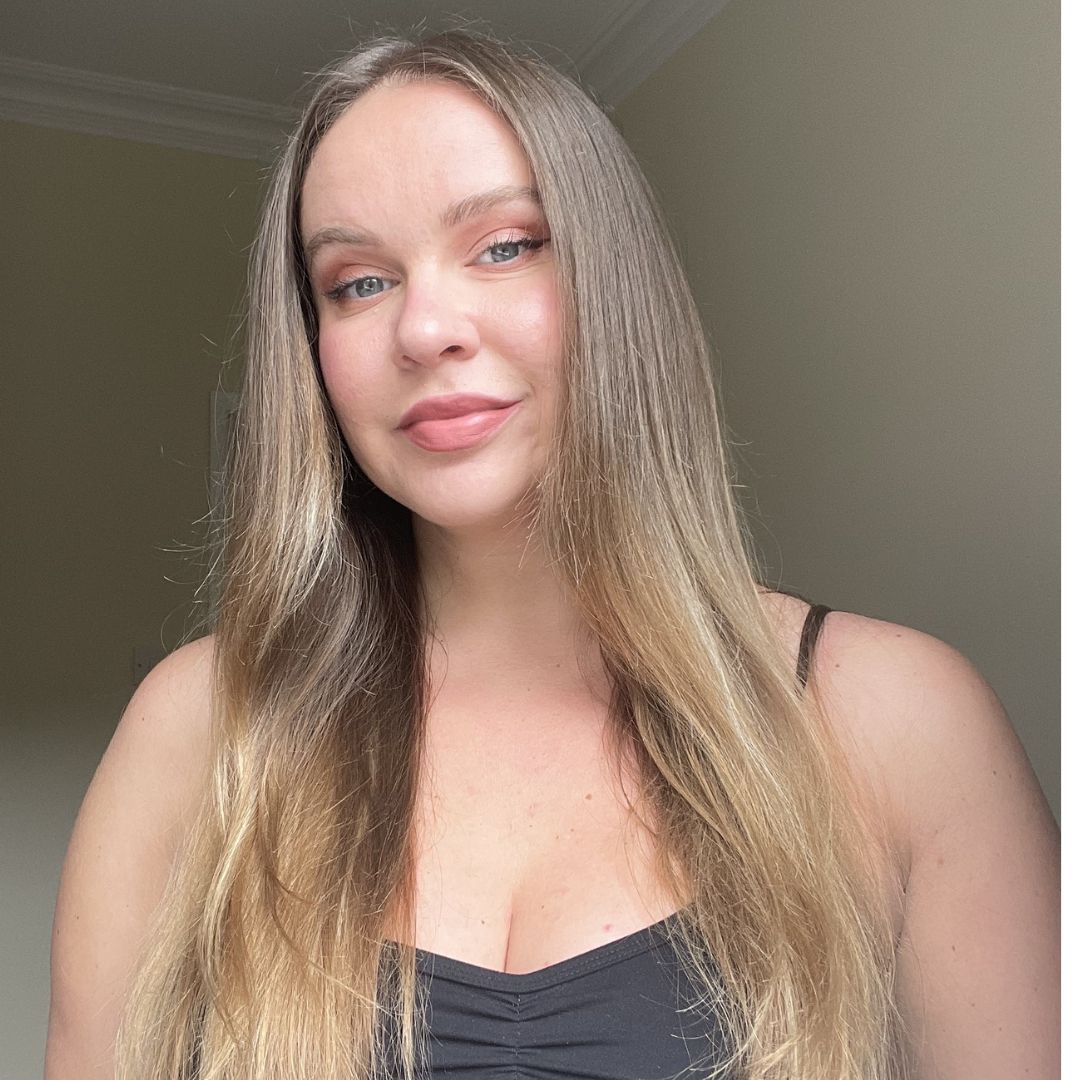
The results
Since the curling process till this point had resulted in pretty tight ringlets, I genuinely expected to have big, bouncy, doll-like curls waiting for me. But after brushing my hair out, it settled into sleek and volumised gentle waves.
The best way I can describe it is like an expensive blow-dry, with a beautiful shape and volume, but sleek and understated at the same time. It took me about 15 minutes in total, and it’s probably the best my hair has ever looked from an at-home styling session. In case you can’t already tell: I’m a huge fan of the Dyson Airwrap.

Valeza's hair after styling with the Dyson Airwrap


